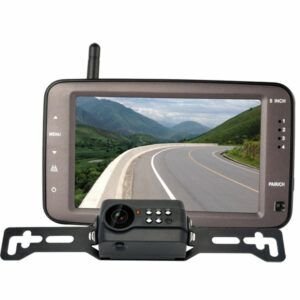
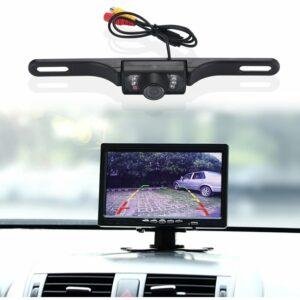
There are several advantages to keeping your rear view camera constantly on, but most cameras don’t come equipped with a constant-on feature. How to keep rear view camera on? Keep reading to find out
Contrary to popular belief, rear view cameras can stay on all the time by simply wiring it differently, or activating the constant-on power supply feature. You can also connect it directly to the ignition or power on the manual switch to keep it constantly on. This article will provide detailed instructions on how to keep the rear view camera on.
Motorists are choosing advanced rear view cameras with upgraded features, including a constant on-feature. You can choose one of these to evade complex installations and adjustments.
But if you’re stuck with one of the older versions, then implement one of the following solutions to keep your rear view camera constantly on.
Table of Contents
4 WAYS TO KEEP YOUR REAR VIEW CAMERA ON
Constant Power Supply
The most popular way of connecting your rear view camera for constant power is by using a constant power supply source in your car. There are multiple options for you to choose the nearest choice to your car. The major ones are the cigarette lighter socket and fuse box. Both can be found on the driver’s side of the car.
The cigarette lighter socket is located on the dashboard while the fuse boxes are located at the driver’s side footwell, engine, and glove compartment. Choose the one nearest to the camera monitor. However, constant supply means higher demand on your car batteries. This can drain your battery and prevent it from starting. Also, you need stronger cables to withstand the constant flow of current.
Ignition
Another way to connect for constant power is by connecting it directly to your ignition. This solution is common with vehicles with bigger batteries. The ignition box is an easy location area and has several installation advantages.
But most importantly, it keeps the rear view camera constantly on at the right time. The rear view camera instantly powers on when the ignition is turned on and turns off when it shuts down. This saves battery as it doesn’t need to run round the clock like other solutions.
However, it can not serve as a security camera like a dashcam as it lacks parking surveillance mode. It is also cheaper as it doesn’t require buying additional parts or hiring an expert as the installation is fairly easy.
Switch
The third option is toggling between the off and on power switch. This solution requires adding a switch box to your rear view camera to control both the receiver and camera installed in the rear. Such a complex connection will require additional cables.
Make sure the wires are compatible and long enough to reach all necessary ends of your rearview system. Once wired, motorists can then switch between the on and off buttons to control power at any time of the day. This means you can decide to leave it on when your car is parked, and use it as a security camera, like a dashcam.
However, motorists may sometimes forget to switch it on. You’re likely to forget when you first install it, but with time, you’ll get used to it.
Upgrade Rear View Camera
Integrated video devices have multiple functions, including displaying car rear and continuous recording. This is an upgraded option to install in small cars and trucks for a slightly higher price. You can find some of the best upgraded integrated options here.
NECESSARY PRECAUTIONS
There are some necessary precautions to take while installing your rear view camera, and things to consider before installation. Weigh the advantages and disadvantages before installation.
First, use a fused power supply. Other sources of power have a higher probability of damaging your rear view camera. You should also consider the weather conditions in your area and driving route. Make sure the camera is water-resistant and can withstand hot weather conditions.
Some of the above options also require more battery juice, so check to make sure your current battery voltage can handle the rear view camera. If not, consider installing a dual battery system. You should also make sure the rear view camera is compatible with the car for easy installation.
HOW TO SET UP NEW REAR VIEW CAMERA
If you’re buying an upgraded rear view camera, knowing the installation process step by step helps you DO IT YOURSELF.
Installing new rear view cameras are better as they come with upgraded features and functions, including a better and easier installation process.
Understanding your vehicle
The first step in installing a new rear view camera is understanding your vehicle. Some designs require specific types of rear view cameras and wiring. For example, wireless rear view cameras don’t need cables for installation.
For complete round-the-clock protection, motorists require continuous streaming, however, OEM factory-installed rear view cameras don’t have this feature as they have limited features and functions.
They are also difficult to modify as most are designed for specific cars and limited adjustments. This makes it impossible to make adjustments to the installation process and mode of operation which is required for adding the constant-on feature. OEM rearview cameras are very limited and cannot exceed the inbuilt functionalities.
So, you need to find a compatible aftermath model for your car type. Make sure it is adjustable and can allow for more connections in case there are new additional accessories to enhance its primary function. Note that it may drain your battery faster than OEM options.
To combat that, switch off the camera when not in use or upgrade the car battery to power all the electrical devices in your car. You can also install a secondary battery to reduce the load of your primary battery.
Next, identify a power source. The two available ones are the fuse box and your cigarette lighter box. Choose the one closest to the camera or monitor to reduce wire length and enjoy better transmission.
Installation (Wiring)
The first step in connecting the camera and monitor is removing the plate number to drill a hole for the cables. Get a Phillips screwdriver to quickly remove the screens from the plate. Make sure you secure the screws after removing them. You can keep a small work beside you to store important things.
Next, remove the trunk’s interior pad using a panel removal tool. Be careful not to break the seals holding the trunk. Next, drill a large hole in the license plate mounting area for passing the camera and power cables to long enough to reach both sides. If there are obstacles, use a tool to remove them, if it is stuck, then find another spot in the mounting area to drill.
Fuse the camera wires and reverse light wires then wrap with tape to protect the connection. Ensure the wires are properly connected by using correct polarity. Connect the positive wires separately from the negative. This helps to improve performance and quality and prevents certain damages that result from reverse polarity.
Once you’re sure that the polarity is correct, run the wires to the front of the car where it’ll connect to the monitor mounted on your ashboard or rear view mirror. Integrating into your rear view mirror is cheap and enhances usage.
Next, connect the RCA cable to the monitor cable and plug the fuse tap into the fuse box. Now, you can install the camera and reattach the license plates with the tightly fitted screws.
But before you completely screw every piece back together, it is recommended that you test the rear view camera to see if it is working optimally. If it is not, trace each connection to find the problem until you find it.
Conclusively, rear view cameras can remain on. Simply make the right adjustments and add the necessary wires, and you can have your rear view camera up and running. This makes it possible to use it as a rear view mirror.


