 Your luxury driving life is incomplete if the audio system in your car is bad or worse if you have none. The presence of good stereo in your ride spices up your journey and makes it splendid as you move on listening to your kind of music for your listening pleasure. Perhaps you are considering installing one and wondering how to go about it, here are steps to follow on how to install car stereo for successful installation.
Table of Contents
Tools needed for installation
Get yourself ready with the following tools necessary for the installation as it makes mockery of the whole process if adequate preparation is not made as you start the installation proper.
- The car stereo
- Sufficient wire
- Voltage tester
- Sound meter
- Wire strippers
- Wire crimpers
- Electric tape
- Soldering Iron and Solder
- Shop tools
- Camera.
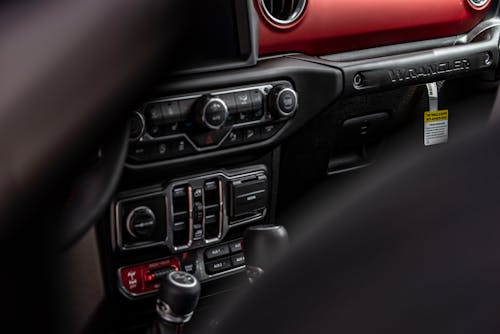
Car stereo
Your first decision is choosing the best car stereo for your car if it does not come with one or you are not satisfied with the performance and desire to change it for better. Check online for the best or check our list of best 10.
Wire Strippers and Crimpers
You need wire stripper to remove the protective coating from the wire to get to the real wire to use while the crimper will be needed to join these stripped wires together firmly and affix this joined cable to a connector or a metal plate depending on where you desire to place them.
Voltage Tester
This will be needed to test the voltage of the wires when joined. It is a handy small tool like a mini ice pick built with light in the middle that is necessary for proper installation and troubleshooting in case of any mistake.
Soldering Iron and Solder
To make your work perfect, there is the need to solder your wires hence you need a soldering iron and the solder. A solder is a great energy conductor that comes handy like a small pool. After twisting the wires together, you heat them up with your soldering iron to glue the wires together and make the joining permanent.
Sound Meter
This is very essential when installing your car stereo and stay within the legal prescinds. You need to measure the decibels of your stereo system output with the sound meter to get the bass and treble levels thus providing a perfect sound mixture for your listening pleasure.
On the side of the law, your sound meter is necessary should you be accosted by any law officer for violating community noise ordinance as a result of your stereo sound.
Shop Tools
Shop tools include hole saw and jig saw, screwdrivers, panel remover and wire puller. You will need the hole and jig saw if you want to carry out standard installation where you do not have existing locations for the speakers and subs or where the existing locations or spaces are insufficient.
They will be needed to cut out portions of the interior to place your speakers and subwoofers. Screwdrivers and panel removal tools will be needed to carefully loose apart the dashboard and door panels while wire puller will assist in routing the speaker wire where your hand cannot penetrate.
Camera
Your camera phone or a small digital camera will be essential to take pictures of the original installation layout to have something like map to follow when carrying out your own systematically.
As human, when you unplug all the wires, it may be a big problem remembering where one wire is removed and where again to place it most especially when your car wiring system is a complex one.
Step by step Installation Procedure
It is taken that your car comes with a stereo/radio system and there is a space already provided for this in your car so there will not be any need to get a hook or stereo hangar. All you need do is just to remove the existing stereo and replace. To successfully install your car stereo, follow this guide.
Get your toolbox
- We expect that you are ready with the appropriate tools as listed above.
- Get your battery disconnected by unplugging the negative terminal to avoid electric shock.
Remove the factory stereo
- Remove the already existing stereo in your car carefully and study how it was connected. You may need to snap a picture of the back to see how the wires were connected before unplugging them. It makes your work easy if you place the new one by your side.
- Depending on how your factory stereo was affixed which we expect you must have studied earlier as explained, follow through in a systematic order as any alteration in the system will not give you best result.
Unplug the connections
- Unplug the plastic wiring harness placed at the back of the stereo opening which connects it to the car’s electrical system and the speakers carefully. You may take a snap here.
- After this, unplug the antenna to complete this stage.
- Now that you have remove the old, it is time to focus on the new stereo set and this involves connecting all the wires same way the old one was.
How to wire
- You probably will need a custom wiring harness to make your work easy and your audio system work better. This harness usually comes with color-coded diagram directing how you connect the harness to your new stereo. There must come with your stereo system a radio wiring diagram contained in the owner’s manual. These two diagrams should guide you step-by-step which color of the car stereo wire to be connected to the adapter harness. It is advisable you do these connections gently, patiently using a work bench or kitchen table or somewhere else other than inside the car following the instructions.
- In case the factory stereo plug has been cut and there is no harness, gently identify each wire of the old stereo and connect them to the corresponding wire of the new stereo following the manual.
Connecting the wires
- As you fasten the wires together in appropriate manner and match, we advise you avoid using tape which may eventually dry off and expose the wire which will in no time short out.
- Use your soldering iron and solder to create a permanent and professional connection that ensures maximum current transfer and keeps your mind at rest.
- After soldering, use your heat-shrink tubing and heat gup to insulate the soldered connection.
- Alternatively, you may crimp the wires together using your wire crimper but be sure you use appropriate crimp connector that will perfectly fit in. Various types of crimp connectors available include crimp caps, butt connectors and bullet connectors.
Power wires(How do you want it to operate)
- Power connection, If you wish to make a direct power connection, there is the need for you to know the differences between ‘switched’ and ‘constant’ power. However, we advise you make all your wire connections pass through the wire harness.
- Switched power is ‘ON’ only when you key is in your ignition. If you choose to adopt, connect your new stereo’s main power lead (usually the red wire) to a switched power source. With this, your stereo will automatically turn on when you switch on your ignition and off when you off your car engine thereby avoiding your car’s battery being drained.
- A constant power is ‘ON’ permanently. Should you prefer this, connect your stereo’s memory lead (usually the yellow wire) to a constant power source to preserve all your preset radio stations, ton control and clock settings every time you turn off your car’s engine. However, this will have effect on your battery with time.
- Few high-powered stereos may demand that you make a direct constant power connection at the positive terminal of your car’s battery with the use of a heavy gauge power wire, in-line fuse and ring terminal to connect the power wire to the battery. For this, pass your power wire through the firewall to the car trunk to make a direct connection to the battery.
Speaker wires
For normal car stereo, you will have eight wires for a 4-speaker system. One positive and negative for the front left, front right, rear left and rear right speakers.
Some of these may not be useful depending on the wiring configuration existing in your car and the wiring harness you might have adopted to use.
Ground wire Precautions
To ensure that your stereo performs excellently well you need to ground (or earth) the black wire properly to eliminate unwanted noise.
Locate a barer surface of the panel or an unpainted bolt or screw that contacts a bare metal surface of the car’s chassis, loosen the bolt and tight the ground wire underneath then re-tight the bolt.
Note that your stereo will not operate at all if you do not properly earth this ground wire or may be giving failing signals that will interfere with your sound if the ground is not tightly connected.
You may need to connect a wire to your emergency or parking brake wire to act as an alternative switch turning on the video monitor whenever you engage the brake this is if your new stereo come with a touchscreen or video monitor.
Though the location of this wire differs in cars but it is usually found where the parking brake is located, you may need to find out where yours is placed in your car’s manual if you patiently go through.
Mount your car stereo
The final stage of your installation after all wires might have been connected is mounting your car stereo but do not fix the detachable face (if this is the type you bought) yet.

Check-up to be sure
You must have slid your stereo into the dash opening by now. Run a check on all that you have done installing the stereo to make sure everything has been properly done as it is easier to fix any identified problem while everything is still opened.
Ensure you re-connect your car’s airbag warning plugs before connecting your battery’s negative terminal initially removed. Now fix up the detachable face of your car stereo turn on the power (ignition) first and power the stereo and try each source, the AM, FM, CD, USB, Bluetooth etc. Adjust the fader and balance settings to ensure that each of the speakers are working well.
Secure all opened places and reinstall any dash trim panel removed once you are satisfied with the work you have just done.
What happens if I wire my car stereo wrongly?
Two things may occur, it is either you have the entire audio system under-performing by giving you sub quality sound which may be very annoying and horrible to hear or the components begin to blow off one after the other or all at once.
It is advisable you follow instructions when installing your car stereo while equally important you buy correct gauge of wires that will be thick enough to carry enough current loads to and from their necessary destinations.
Best car stereo to buy
- Pioneer In-Dash Built-in.
- Pioneer AVH-X390BS.
- JVC KD-X350BTS 1-Din.
- Pioneer Single-DIN In-Dash.
- BOSS Audio 820BRGB.
- Kenwood KDC-168U In-Dash.
- BOSS Audio BV7335B Single Din.
- JVC Single-Din Built-in Bluetooth.
Conclusion
Checking through the process as outlined above, you will agree with us that to install a car stereo is simple. However, simple as it seems, you will need to follow painstakingly the instructions as outlined in the owner’s manual as there may be slight modifications depending on the brand and specification of the type of car stereo you purchased.
Be Always guided by the instructions contained in the manual as prescribed by the manufacturers. We hope now you know how to install car stereo, if you have a comment or question, leave it in the box below, we will be glad to hear from you.

